

라이다센서
라이다센서는 Ydlidar의 G4모델을 사용하였다.
중국 회사의 제품이지만 가격대비 나쁘지 않은 성능을 보여준다.
그리고 아래 작성한 튜토리얼은 YdLidar가 아니더라도 대부분의 라이다와 ROS의 연동과정과 비슷하므로 참고해도 좋다.
YDLIDAR|Focus on lidar sensor solutions
Robot cleaner By providing low-cost, high-lifetime, small-sized, high-stability lidar, it helps intelligent sweeping robots easily implement application solutions such as mapping, obstacle avoidance and navigation.
www.ydlidar.com
YdLidar GitHub에서 레포지토리 클론하고 빌드하기
이런 센서 종류의 소스코드 패키지를 찾는 가장 쉬운 방법은 ['센서이름' + GitHub]의 키워드로 구글에 검색하는 것이다.
구글에 검색하면 각 회사에서 배포하는 패키지의 레포지토리가 나온다.
YdLidar의 ROS2 레포지토리는 아래로 들어가면 된다.
하나는 SDK이고 하나는 ROS2 패키지이다.
둘 다 클론 해준다.
GitHub - YDLIDAR/YDLidar-SDK: Driver for receiving YD LiDAR data and more...
Driver for receiving YD LiDAR data and more... Contribute to YDLIDAR/YDLidar-SDK development by creating an account on GitHub.
github.com
GitHub - YDLIDAR/ydlidar_ros2_driver: ydlidar driver package under ros2
ydlidar driver package under ros2. Contribute to YDLIDAR/ydlidar_ros2_driver development by creating an account on GitHub.
github.com
cd && git clone https://github.com/YDLIDAR/YDLidar-SDK.git
cd ~/YDLidar-SDK/cmake
cmake ..
make
sudo make install
sudo apt-get install python swig
sudo apt-get install python-pip
cd .. && pip install .
cd && mkdir -p ~/ydlidar_ws/src
cd ~/ydlidar_ws/src
git clone https://github.com/YDLIDAR/ydlidar_ros2_driver.git
cd .. && colcon build --symlink-install
//노란색 경고가 표시되지만 무시해도 된다.
그다음 본인의 라이다센서에 맞는 파라미터를 수정해줘야 한다.
각 모델마다 보드레이트나 각종 설정이 다를 수 있으므로 docs 파일에 가서 파라미터에 대한 정보를 확인하여 알맞게 적어준다.
참고로 파라미터의 폴더는 아래에 위치한다.
cd ~/ydlidar_ws/src/ydlidar_ros2_driver/params우리가 사용한 YdLidar G4 모델 같은 경우 파라미터가 기본으로 세팅되어 있는 값이라 수정해 줄 필요가 없었다.
파라미터 수정이 완료되었다면 다음 과정을 수행한다.
chmod 777 src/ydlidar_ros2_driver/startup/*
sudo sh src/ydlidar_ros2_driver/startup/initenv.sh
//위 과정이 완료되었다면 컴퓨터 혹은 SBC와 연결된 USB선을 뺐다가 다시 꼽는다.
YdLidar의 노드를 작동해 본다.
source ~/ydlidar_ws/install/setup.bash
ros2 run ydlidar_ros2_driver ydlidar_ros2_driver_node
이제 라이다센서가 회전하며 작동하는 것을 볼 수 있다.
라이다센서 데이터 확인해 보기
라이다센서의 노드를 작동시켰다면 정상적으로 데이터를 가져오는지 확인해봐야 한다.
이미 위 과정에서 라이다센서의 노드를 작동시켰으므로 아래 명령어를 실행하면 노드의 정보와 발행되고 있는 토픽을 확인 가능할 것이다.
ros2 node list
>> /ydlidar_node

ros2 topic list
>> /parameter_events
>> /rosout
>> /scan
보다시피 노드 이름은 /ydlidar_node이며 발행되는 토픽 이름은 /scan이다.
그렇다면 이 노드의 토픽은 어떤 인터페이스를 이용하여 데이터를 전송하고 있는지 알아보자.
ros2 topic type /scan
>> sensor_msgs/msg/LaserScan

ros2 interface show sensor_msgs/msg/LaserScan
>> # Single scan from a planar laser range-finder
>> #
>> # If you have another ranging device with different behavior (e.g. a sonar
>> # array), please find or create a different message, since applications
>> # will make fairly laser-specific assumptions about this data
>>
>> std_msgs/Header header # timestamp in the header is the acquisition time of
>>	 builtin_interfaces/Time stamp
>>	 	 int32 sec
>>	 	 uint32 nanosec
>>	 string frame_id
>>                              # the first ray in the scan.
>>                              #
>>                              # in frame frame_id, angles are measured around
>>                              # the positive Z axis (counterclockwise, if Z is up)
>>                              # with zero angle being forward along the x axis
>>
>> float32 angle_min            # start angle of the scan [rad]
>> float32 angle_max            # end angle of the scan [rad]
>> float32 angle_increment      # angular distance between measurements [rad]
>>
>> float32 time_increment       # time between measurements [seconds] - if your scanner
>>                              # is moving, this will be used in interpolating position
>>                              # of 3d points
>> float32 scan_time            # time between scans [seconds]
>>
>> float32 range_min            # minimum range value [m]
>> float32 range_max            # maximum range value [m]
>>
>> float32[] ranges             # range data [m]
>>                              # (Note: values < range_min or > range_max should be discarded)
>> float32[] intensities        # intensity data [device-specific units].  If your
>>                              # device does not provide intensities, please leave
>>                              # the array empty.
보다시피 해당 인터페이스 타입은 타임스태프, 각도, 범위 등 다양한 정보를 내포하고 있다.
자 그렇다면 실제 노드에서 발행하는 토픽을 엿들어보자.
ros2 topic echo /scan

>>---
>> header:
>>   stamp:
>>    sec: 1677523122
>>    nanosec: 319835024
>>  frame_id: laser_frame
>> angle_min: -3.1415927410125732
>> angle_max: 3.1415927410125732
>> angle_increment: 0.006919807754456997
>> time_increment: 0.00011111100320704281
>> scan_time: 0.09888879209756851
>> range_min: 0.009999999776482582
>> range_max: 64.0
>> ranges:
>> - 0.0
>> - 0.0
>> - 0.0
>> - 0.0
>> - 0.0
>> '...'
굉장히 빠르게 데이터가 전송되기 때문에 'Ctrl + C'를 눌러 확인해 보는 것이 좋다.
위에서 확인했던 인터페이스 정보처럼 잘 발행되는 것을 확인할 수 있다.
이는 라이다센서가 현재 주변의 반사된 레이저를 회수한 데이터이다.
따라서 라이다센서를 들고 이리저리 회전시키며 데이터의 변화를 살펴보자.
Rviz2로 라이다센서 데이터를 시각화하여 확인하기
위 튜토리얼을 따라왔다면 라이다센서 노드 하나가 계속 실행되고 있을 것이다.
Rviz2에서 데이터를 확인하기 위해서는 패키지에 있는 Launch 파일을 실행시켜야 한다.
Launch 파일을 실행시킨다 하더라도 Rviz2 창이 뜨며 바로 데이터를 확인할 수 있는 건 아니다.
Launch 파일에는 Rviz2에서 데이터 시각화에 필요한 다른 노드들을 깔끔하게 한 번에 실행할 수 있도록 구성되어 있다.
해당 Launch파일에는 라이다센서 실행노드, 라이프사이클 노드, TF2 노드 총 3가지가 동시 실행된다.
여기 Launch 파일에서 수정해야 할 부분이 있다.
파일을 수정하지 않을 경우 다음과같은 오류가 발생한다.
오류가 발생하지 않을경우 넘어가도 된다.
launch.invalid_launch_file_error.InvalidLaunchFileError: Caught exception when trying to load file of format [py]: __init__() missing 2 required keyword-only arguments: 'name' and 'namespace'Launch API 인자의 변수명과 관련한 오류이므로 아래와 같이 수정한다.
전체 복사 붙여 넣기 하여도 된다.
#!/usr/bin/python3
# Copyright 2020, EAIBOT
# Licensed under the Apache License, Version 2.0 (the "License");
# you may not use this file except in compliance with the License.
# You may obtain a copy of the License at
#
#     http://www.apache.org/licenses/LICENSE-2.0
#
# Unless required by applicable law or agreed to in writing, software
# distributed under the License is distributed on an "AS IS" BASIS,
# WITHOUT WARRANTIES OR CONDITIONS OF ANY KIND, either express or implied.
# See the License for the specific language governing permissions and
# limitations under the License.

from ament_index_python.packages import get_package_share_directory

from launch import LaunchDescription
from launch_ros.actions import LifecycleNode
from launch_ros.actions import Node
from launch.actions import DeclareLaunchArgument
from launch.substitutions import LaunchConfiguration
from launch.actions import LogInfo

import lifecycle_msgs.msg
import os


def generate_launch_description():
    share_dir = get_package_share_directory('ydlidar')
    parameter_file = LaunchConfiguration('params_file')
    node_name = 'ydlidar_node'

    params_declare = DeclareLaunchArgument('params_file',
                                           default_value=os.path.join(
                                               share_dir, 'params', 'ydlidar.yaml'),
                                           description='FPath to the ROS2 parameters file to use.')

    driver_node = LifecycleNode(package='ydlidar',
                                executable='ydlidar_node',
                                name='ydlidar_node',
                                output='screen',
                                emulate_tty=True,
                                parameters=[parameter_file],
                                namespace='/',
                                )
    tf2_node = Node(package='tf2_ros',
                    executable='static_transform_publisher',
                    name='static_tf_pub_laser',
                    arguments=['0', '0', '0.02','0', '0', '0', '1','base_link','laser_frame'],
                    )

    return LaunchDescription([
        params_declare,
        driver_node,
        tf2_node,
    ])
이제 런치파일을 실행할 수 있다.
ros2 launch ydlidar ydlidar_launch.py정상적으로 실행되는 것을 확인했다면 터미널에서 RVIZ2를 실행해 준다.
rviz2
- 왼쪽 하단의 [Add] 버튼을 누르고 [By topic]을 누른다.

- /scan 탭의 하위항목 LaserScan을 더블클릭하여 추가한다.
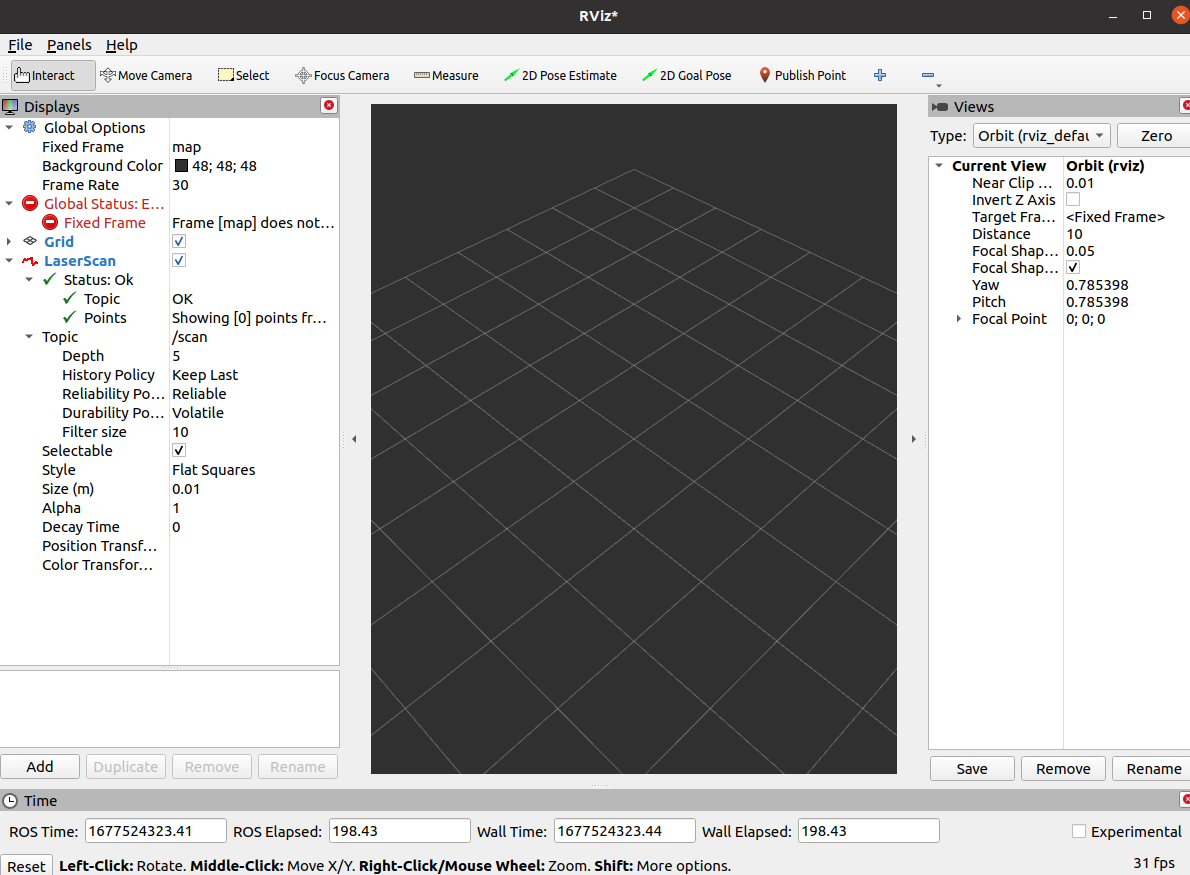
- [Global Option] 탭의 [Fixed Frame]을 laser_frame으로 변경해 준다.

- [LaserScan] 탭에서 [Topic] 탭의 [Reliability Policy]의 항목을 Best Effort로 변경한다.
- [LaserScan] 탭에서 [Size (m)]의 항목을 0.05로 입력한다.
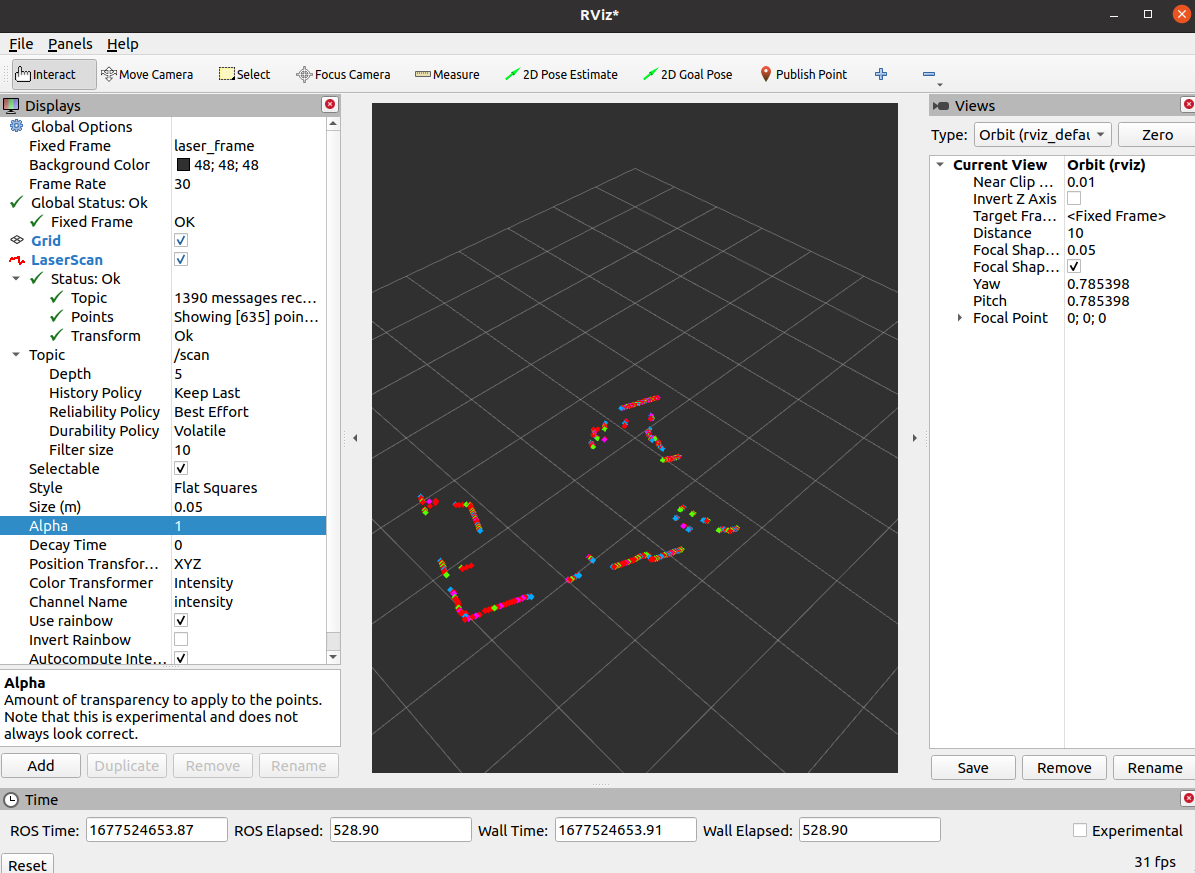
- 라이다 데이터를 시각화한 결과와 주변 환경을 대조해 본다.
라이다 각도 제한
라이다센서의 범위를 파라미터로 제어하여 일정 범위만 받는 테크닉도 구현 가능하다.
보통의 ROS2 패키지에서는 파라미터 정보가 담긴 yaml파일을 param 폴더에 저장해둔다.
ydlidar같은경우 ydlidar.yaml 파일로 저장이 되어있다.
ydlidar_ros2_driver_node:
  ros__parameters:
    port: /dev/ttyUSB0
    frame_id: lidar_1 #default = laser_frame
    ignore_array: ""
    baudrate: 230400
    lidar_type: 1
    device_type: 0
    sample_rate: 9
    abnormal_check_count: 4
    resolution_fixed: true
    reversion: true
    inverted: true
    auto_reconnect: true
    isSingleChannel: false
    intensity: false
    support_motor_dtr: false
    angle_max: 90.0
    angle_min: -90.0
    range_max: 64.0
    range_min: 0.01
    frequency: 10.0
    invalid_range_is_inf: false
여기서 angle_max와 angle_min을 조정해주면 된다.
라이다 센서의 전방을 기준으로 0도이며 CW방향으로 0 ~ -180이고 CCW방향으로 0 ~ +180의 각도를 가진다.
따라서 본인이 원하는 정도의 각도를 입력해주면 해당 각도의 데이터만 /scan 토픽으로 받을 수 있다.
'개인프로젝트 > 메카넘휠 로봇 제작' 카테고리의 다른 글
| [8] 메카넘휠 로봇의 파라미터 변경을 통한 통합 런치파일 구성 (0) | 2023.03.07 |
|---|---|
| [7] ROS2 메카넘휠 모터 제어 (0) | 2023.03.05 |
| [6] 메카넘휠 로봇 SBC(single-board computer) 세팅 (0) | 2023.02.12 |
| [5]메카넘휠 로봇 하드웨어 빌드업 (3) | 2023.02.12 |
| [1] 메카넘휠 모바일 매니풀레이터 설계 - 주행부 PART1 (0) | 2023.02.03 |